The Options Menu
The menu in the main toolbar allows you to define the default behavior for many of the operations in EViews. Most options are found within the and menu items.
General Options
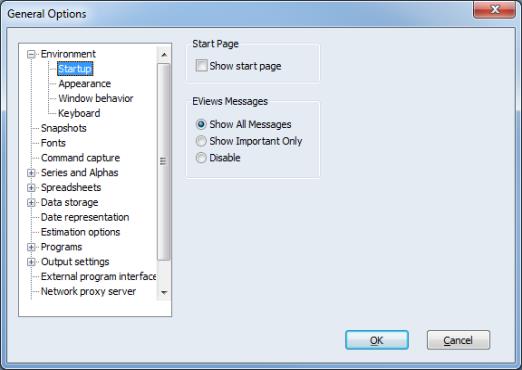
When you click the menu item, EViews brings up the dialog. This dialog is broken up into many sections which are accessible using the tree on the left-hand side of the dialog. We discuss briefly the options within each of these sections. In some cases, additional detail is provided in the corresponding sections of the manual.
Startup
The startup section controls the display of the startup page, and the handling of messages.
Environment Appearance
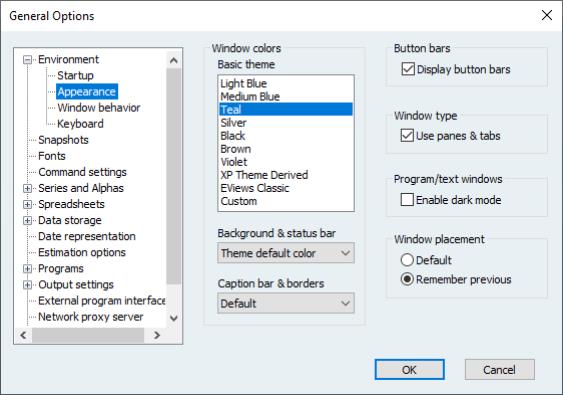
EViews provides a number of color themes to modify the appearance of your EViews environment.
Visual Settings for Windows
In the groupbox, you may select from a variety of basic themes, including , , and . You can completely customize the color by selecting .
You can let the background and status bar follow this color theme, or choose a different color from the dropdown.
Not surprisingly, the dropdown may be used to choose the visual style of your caption bar and borders. The setting is for EViews to draw the caption bars and borders using colors in a style to match your operating system (either Windows XP or Windows Vista/Windows 7). You may instead choose or to have EViews choose a style independent of your operating system. If you have modified your operating system settings for window borders and text, and wish to have the operating system draw the caption and borders, you should select
Most windows in EViews have a row of buttons along the top, called the button bar. To hide these buttons on all windows, uncheck on the top right of the dialog.
You may use the checkbox to control the background in program and text windows.
Window type
To maximize the use of space on smaller screens, the pane and tab user-interface mode offers a more organized way of displaying and grouping windows.
When is checked, workfiles, programs, and database windows appear as panes that can be docked in different locations, grouped together, toggled to automatically hide or display, and float outside the EViews frame.
Object windows will appear as tabbed windows using all the available client area inside the EViews frame. Multiple object windows appear as different tabs, and these tabs can be divided and stacked separately to view multiple objects simultaneously.
Window placement
The layout positions of primary windows (workfiles, programs, and database windows) can now be remembered between EViews sessions. Remembering positions between sessions is especially useful in Pane & Tab mode (
“Pane and Tab User Interface”) since primary windows may be positioned outside the EViews frame in that mode.
To remember positions, simply select the radio button.
For each primary file, layout settings are stored in a hidden text file using the original name, but with the extension “.evsettings”. If you share both the primary file and the layout file with others, the original layout will be restored upon opening the primary file.
Note that when restoring window positions, complicated layouts such as panes grouped together may not appear exactly as before, especially if the layout is dependent on the existence of other panes.
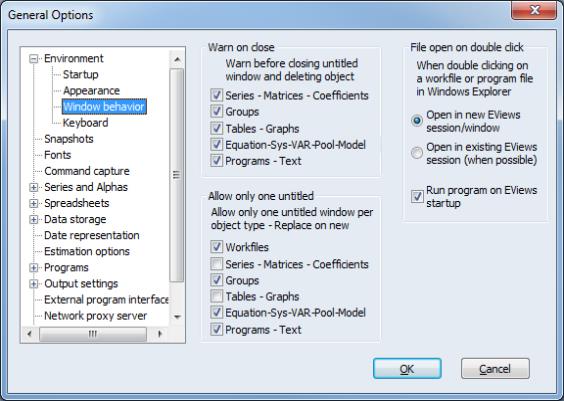
Window Behavior
The page controls the display characteristics of various types of EViews output.
The settings are divided into broad groupings:
• The Warn On Close section in the upper left-hand corner of the dialog instructs EViews to provide a warning message when you close an untitled object. You may choose to set warnings for various object types. By default, EViews warns you that closing an unnamed object without naming it will cause the object to be deleted. Along with the warning, you will be given an opportunity to name the object. If you turn the warning off, closing an untitled window will automatically delete the object.
• Allow Only One Untitled specifies, for each object type, whether to allow multiple untitled objects to be opened at the same time. If only one is allowed, creating a new untitled object will cause any existing untitled object of that type to be deleted automatically. Setting EViews to allow only one untitled object reduces the number of windows that you will see on your desktop.
If you elect to allow only one untitled object, we strongly recommend that you select . With this option set, you will be given the opportunity to name and save an existing untitled object, otherwise the object will simply be deleted.
• File open on double click controls the whether to use an existing EViews session or to launch an additional session when opening an EViews associated file. Selecting means that when using Windows to open an EViews file, say by double clicking, selecting an EViews file from the start menu, or opening as an email attachment, the file will open in an already running copy of EViews, if available.
• determines the behavior of EViews when launching the program by double clicking on a program file in a Windows directory. By default EViews, will open and run the program when you double click. Unselect this checkbox to prevent the program from being run automatically. Note that if EViews is already running when the program file is double-clicked, EViews will only open the file, regardless of this setting. This setting only applies when a new instance of EViews is launched to handle the program file.
Keyboard
The page offers options for setting focus and for smart editing.
• Keyboard Focus controls where the keyboard cursor is placed when you change views or windows. As the label suggests, when you select , the keyboard focus will go to the command window following a change of view. This setting is most useful if you primarily use EViews via the command line. Choosing will cause the focus to go to the active window following a change of view. You will find this setting useful if you wish to use keystrokes to navigate between and to select items in various windows. Note that whatever the default setting, you may always change the keyboard focus by clicking in the command window, or by clicking in the active window.
• allows you to turn off the automatic pop-up that displays possible entries in edit fields. If is selected, the list will be presented, after a pause in typing, from within most edit fields except the command window. If is selected, you can use the keystroke, as always, to bring up the list of entries.
• You may change the delay used when automatic pop-ups are enabled, by entering the desired number of milliseconds in the appropriate edit field.
Snapshots
By default, EViews 10 will automatically check for changes every five minutes and then save a snapshot only if changes are detected. These automatic snapshots will be deleted when the workfile is closed.
You can change the default snapshot settings in the dialog.
Snapshots are usually saved into a hidden folder in the same directory as the main workfile. However, you can group all the snapshot folders into the same location by specifying a common snapshots folder.
For automatic snapshots, you can change how often EViews performs the check, and whether snapshots should be kept if no changes are detected. You can also tell EViews not to discard automatic snapshots when the workfile is closed and to limit how many auto snapshots should be kept. Setting this value to zero will allow unlimited auto snapshots.
Finally, you can also set a time limit (in seconds) for an automatic snapshot to operate for each workfile. Because workfiles can sometimes take a long time to load or save, auto snapshots will be skipped for any workfile that takes longer than 10 seconds to load or save. This time restriction prevents auto snapshots from locking up EViews for too long while running in the background. Any workfile that takes too long to open or save will then optionally prompt you to exclude it from any further automatic snapshots. You can change this time limit to zero to remove all time restrictions.
To prevent EViews from prompting you with each workfile that takes too long, you can also uncheck the checkbox.
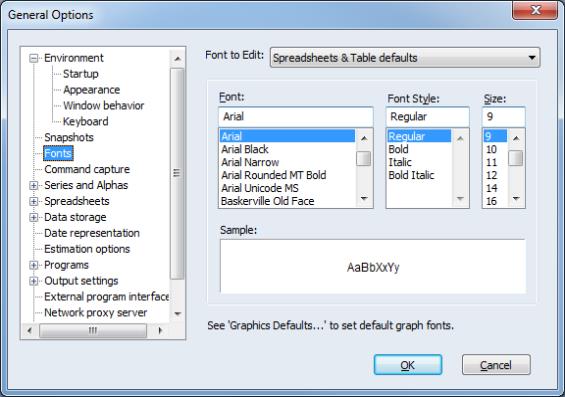
Fonts
The Fonts section allows you to change the default font styles and sizes for various sets of windows and objects. Select the type of object for which you want to change the font from the dropdown at the top of the dialog and modify the font settings below. For example, to set the default font face and size to be used in table objects and table views of objects, select and modify the settings below the dropdown.
Command Capture
The setting determines whether to echo the contents of the command capture to the command window. Choosing allows the contents of the command capture to be displayed in both windows. Choosing puts the contents of the command capture in the command capture window.
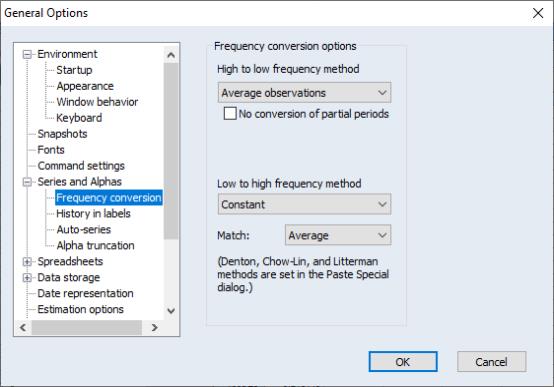
Frequency Conversion
The dialog within the section allows you to set the default frequency conversion methods for both up and down conversion, and the default method of displaying dates.
The default frequency conversion method tells EViews how to convert data when you move data to lower or higher frequency workfiles. The frequency conversion methods and use of default settings are discussed in detail in
“Reading EViews Data using Other Applications”.
Series Auto Labels
You may elect to have EViews keep a history of the commands that created or modified a series as part of the series label. You can choose to turn this option on or off in the dialog within the section.
Note that the series label may be viewed by selecting in a series window, or at the top of a series spreadsheet if the spreadsheet defaults are set to display labels (
“Spreadsheet Layout”).
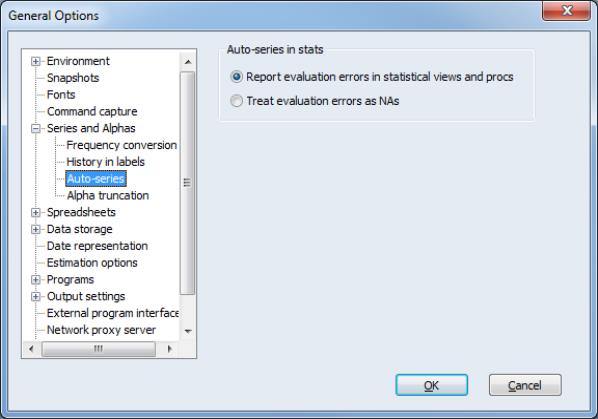
Auto-series
In the page under , the option lets you control whether EViews simply ignores evaluation errors in auto-series when performing statistical analysis, or reports an error. Auto-series are functions or expressions of existing workfile series that may be used in a statistical procedure.
For example, the auto-series LOG(X) may be used as a regressor in an equation object, or as one of the series used in a cointegration test. When the option is set to , if the auto-series cannot be evaluated for any observation (for example, any observation where X is negative when using LOG(X)), EViews will error and, possibly, stop computation of the statistical procedure. If the option is set to , any observation that cannot be evaluated will simply be converted into an NA and the statistical computation will continue, usually ignoring that observation.
History in Labels
You may set the default for whether or not to save the command history in the series labels.
Auto-series
You may choose whether or not to treat evaluation errors in auto-series as missing (NA) values, or whether to report an error when an evaluation error is encountered.
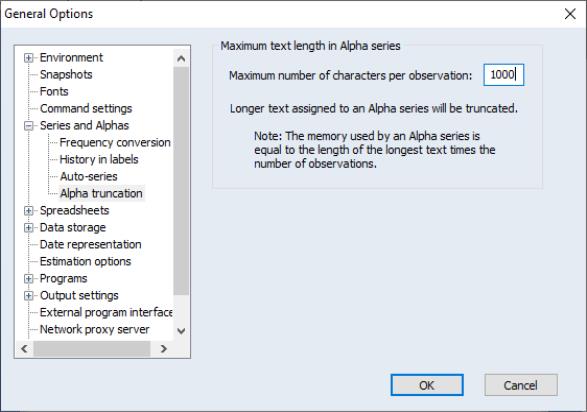
Alpha Truncation
Note that EViews alpha series automatically resize as needed, up to the truncation length.
To modify the alpha series truncation length, select from the section, andenter the desired length. Subsequent alpha series creation and assignment will use the new truncation length.
You should bear in mind that the strings in EViews alpha series are of fixed length, so that the size of each observation is equal to the length of the longest string. If you have a series with all short strings, with the exception of one very long string, the memory taken up by the series will be the number of observations times the longest string size.
The maximum string length is 1,000 characters.
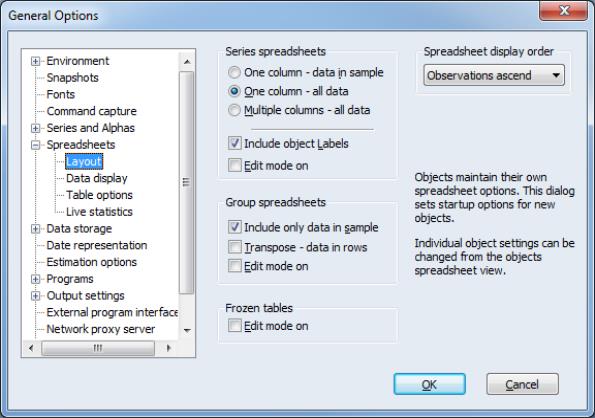
Spreadsheet Layout
The options in the dialog within the section control the default spreadsheet view settings of series, group, and table objects. The defaults are set using these option settings when the object is first created.
In the portion of the dialog, you may set the display format and choose to display the spreadsheet in one or multiple columns, with or without object labels and header information. In addition, you may choose to have edit mode turned on or off by default.
Below this section are the options for sample filtering, transposed display, and edit mode.
allows you to modify whether edit mode is on or off by default.
You may set the to or from the dropdown in the upper-right corner of the dialog.
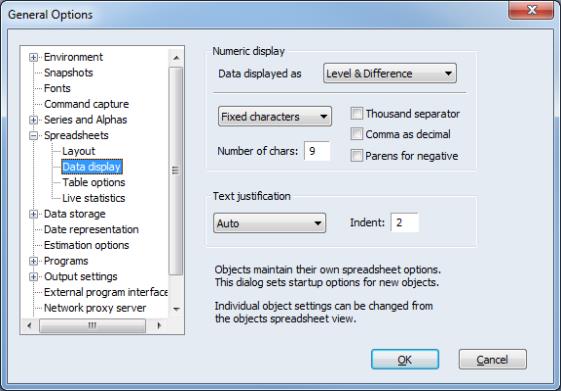
Spreadsheet Data Display
The dialog within the section provides other default settings that apply to new numeric and text spreadsheets.
The dropdown menu, in the portion of the dialog, determines what type of data the rest of the section refers to. You can specify a display format for each of the transform types specified in the dropdown menu (, , or ). For instance, if you select , you can alter the numeric formatting of cells, set the number of digits to be displayed, as well as specify the characters used as separators and indicators for negative numbers, for data displayed using this transform method. To set the default display for other transform types, you may change the dropdown menu.
You may also choose the default and for alphanumeric display.
We emphasize the fact that these display options only apply to newly created series or group objects. If you subsequently alter the defaults, existing objects will continue to use their own settings.
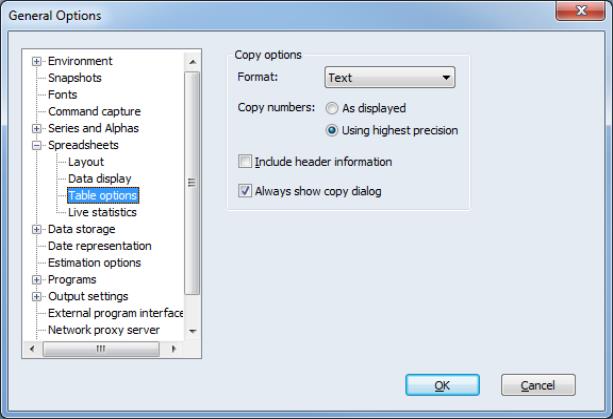
Table Options
The table options section contains options for copying tables.
You may, by default, copy in text, LaTeX, HTML, or Markdown formats. Number may be copied as depicted, or at highest resolution. Table headers may be copied or not, and you may show or suppress the copy options dialog each time you perform a copy.
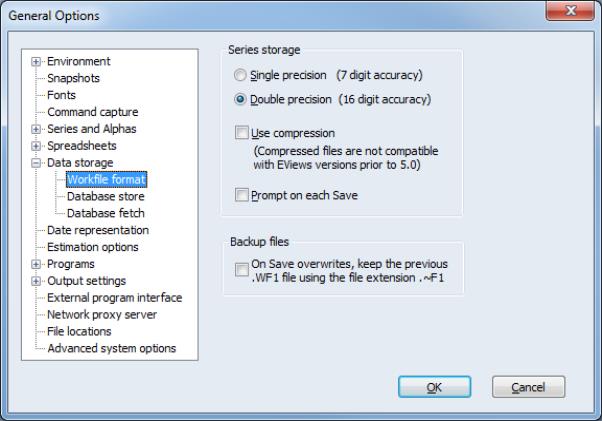
Workfile Storage Defaults
The dialog in the section allows you to specify storage precision and compression options for your saved workfiles, and to specify whether to create backup workfiles when overwriting existing files on disk.
The portion of the dialog controls whether series data are stored in saved workfiles in single or double precision. Note that workfiles saved in single precision will be converted to double precision when they are loaded into memory.
In addition, you may elect to save your workfiles in compressed format on disk by checking the setting. Note that compressed files are not readable by versions of EViews prior to 5.0, and that they do not save memory when using the workfile, as it is uncompressed when loaded into memory. Compressed workfiles do, however, save disk space.
You should uncheck the checkbox to suppress the workfile save dialog on each workfile save.
In addition, you may specify whether EViews should keep backup copies of workfiles when saving over an existing file. If selected, the automatic backup copy will have the same name as the file, but with the first character in the extension changed to “~”.
Database Storage Defaults
You may also control the default behavior of EViews when moving data into and out of databases using the and dialogs within the section. These dialogs control the behavior of group store and fetch (see
“Storing a Group Object” and
“Fetching a Group Object”), and whether data are stored to databases in single or double precision.
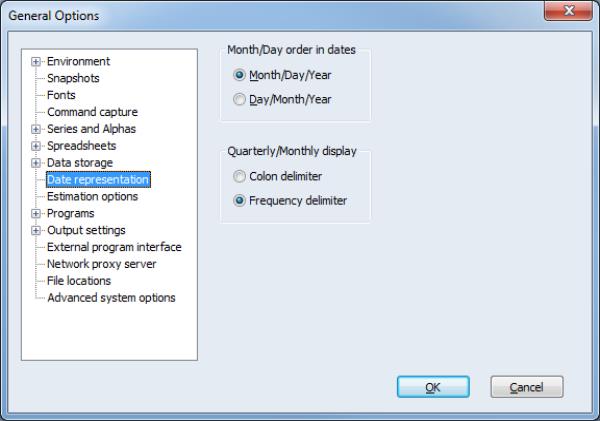
Date Representation
The dialog controls the format for dates in sample processing, and in workfile and various object views. For daily and weekly data, you can set the default to American () or you may switch to European notation (), where the day precedes the month. You may also specify your quarterly or monthly date display to use the or a character based on the workfile frequency (“q” or “m”). The latter has the advantage of displaying dates using an informative delimiter (“1990q1” vs. “1990:1”).
See also
“Free-format Conversion Details”for related discussion.
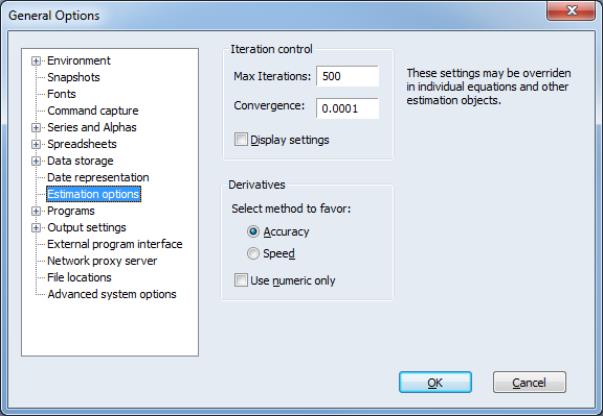
Estimation Defaults
You can set the global defaults for the maximum number of iterations, convergence criterion, and methods for computing derivatives in the dialog.
These settings will be used as the default settings in iterative estimation methods for equation, log likelihood, state space, and system objects. Note that previously estimated EViews objects that were estimated with the previous default settings will be unchanged, unless reestimated. See
“Setting Estimation Options” for additional details.
When the option is checked, EViews will produce additional output in the estimation output describing the settings under which estimation was performed.
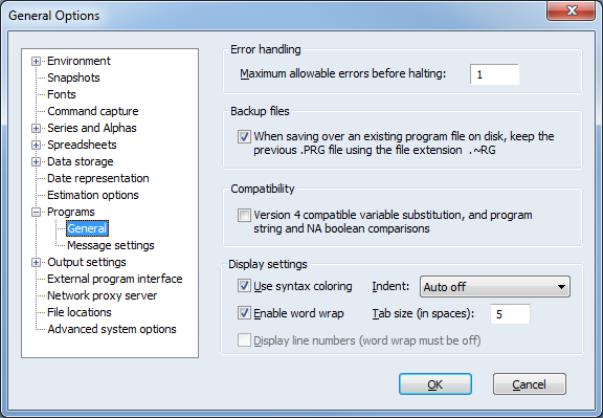
Programs
The first page of the section provides some general options for running EViews programs. You can stop a program from running after exceeding a specified number of errors by entering the error count in .
You may also use this dialog to specify whether EViews should keep backup copies of program files when saving over an existing file. The backup copy will have the same name as the file, but with the first character in the extension changed to “~”.
If the checkbox labeled is selected, EViews will use the variable substitution behavior found in EViews 4 and earlier versions. EViews 5 changed the way that substitution variables are evaluated in expressions. You may use this checkbox to use Version 4 substitution rules. See
“Version 4 Compatibility Notes”for additional discussion.
In addition, you may modify the to change the display of text and editing behavior in program files.
If is selected, basic programming keywords, strings, and comments will be displayed in color. You may also and in programs.
The two controls on the right-hand side determine auto-indenting and tab size settings. The edit box lets you set how many characters a tab will use in the program editor. The dropdown lets you specify the type of automatic indenting that the program editor will use. means that EViews will attempt to automatically apply a single tab for lines of code that are inside a program statement (“For/Next”, “If/Endif”, “While/Wend”), or inside a subroutine. Note that the single tab will be applied on top of any tabbing that was already in place. means that EViews will apply automatic indenting, and will also automatically close any program statement. For example, EViews will automatically add “Next” to the start of the next line when you finish a line starting with “For”. means no automatic indenting will be employed.
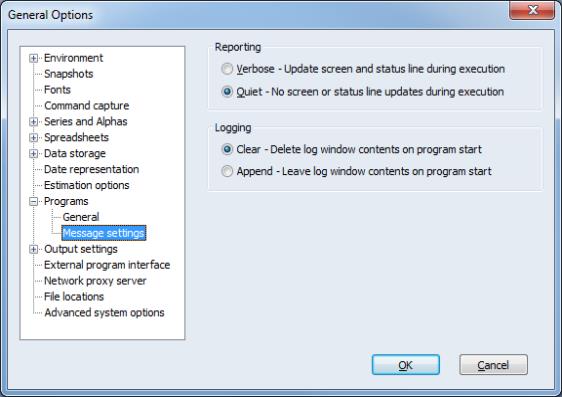
The dialog in the section specifies whether, by default, EViews runs programs in mode, listing commands in the status line as they are executed, or whether it uses mode, which suppresses this information. EViews will run faster in quiet mode since the status line display does not need to be updated.
This default may always be overridden from the dialog, or by using the option “q” in the run statement, as in:
run(q) myprogram
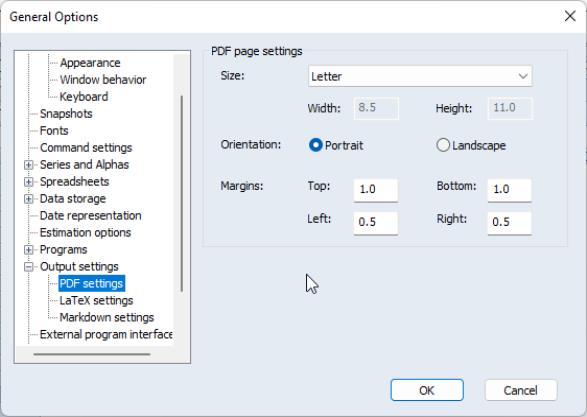
PDF Page Settings
The dialog determines default settings when you export an object as a PDF (Portable Document Format). You may set the to a preset type and size, or determine your own. You may also set the default and for your PDF output.
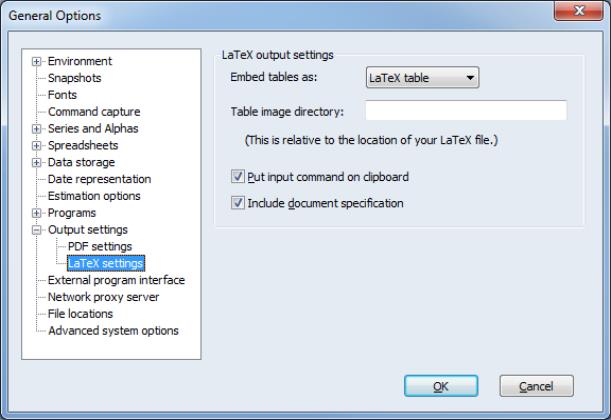
LaTex Settings
The LaTex settings section controls the default output of tables in LaTex as either tables, or images embedded in LaTeX commands. In addition, you can specify a directory in which the images should be stored, and instruct EViews to put the LaTeX input command on the clipboard so it may easily be used in your documents. You may also set the default for whether or not to include a full LaTeX document specification in your output.
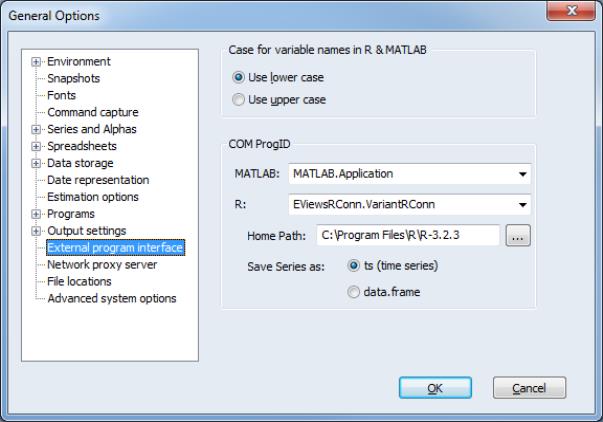
External Program Interface
The entry allows you to specify the default case to use when creating destination objects in MATLAB or R using the xput command. The defaults may be overridden by specifying the “case=lower” or “case=upper” option in the xopen command or by specifying an explicit destination name using the “name=” option in the xput command.
You may also use the section of the dialog to specify the default Programmatic IDs (ProgIDs) used when instantiating a MATLAB or R COM server. The ProgID is used to indicate the version of MATLAB or statconnDCOM to which EViews connects when you issue an xopen command. Each dropdown will contain values found in the Windows registry on your system that were entered when you installed MATLAB and statconnDCOM. You may choose from entries in the dropdowns, or type in a specific ProgID for EViews to use when opening a MATLAB or R session. The default settings may be overridden by specifying “progid=” in the xopen command.
For details on these settings see
xopen and
xput.
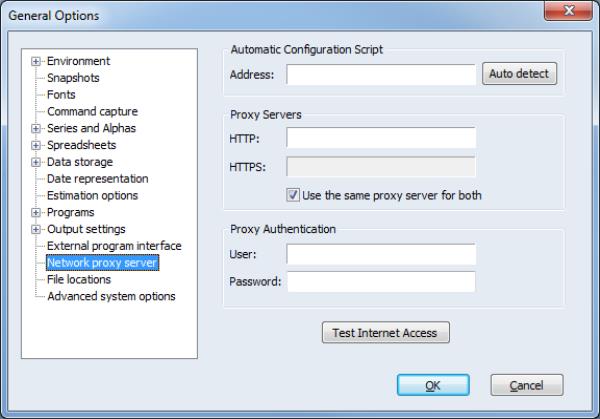
Network Proxy Server
Some EViews features (such as automatic update, registration) require internet access. If internet access is only available on your network via a proxy server, you may provide EViews will your proxy server settings.
Simply click on to display the relevant dialog and enter your settings. You may click on the button to have EViews try to determine your settings for you. Note that valid proxy server setting values generally take the form:
servername:8080
where servername represents the name (or IP address) of the proxy server and 8080 is replaced by the actual port number be employed.
If Microsoft Internet Explorer has previously setup properly with a proxy server on the current machine, you can click the button to import the current settings into EViews.
EViews is only concerned with HTTP and HTTPS access. For a single proxy server that supports both protocols, enter the server name and port number into the HTTP edit field.
If a different server is used for HTTPS, uncheck the checkbox and enter the server name and port number into the HTTPS edit field.
For a proxy server that requires username/password authentication, enter the information into the fields.
Click the button to test these settings on your local network.
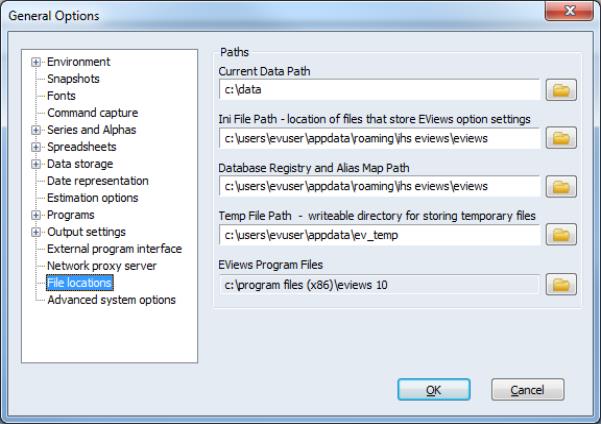
File Locations
This selection allows you to set the default working directory, and the locations of the .INI file, database registry and alias map, and the temp directory.
The dialog also reports, but does not allow you to alter, the location of your EViews executable.
Note that the default working directory may also be changed via the and or dialogs, or by using the cd command.
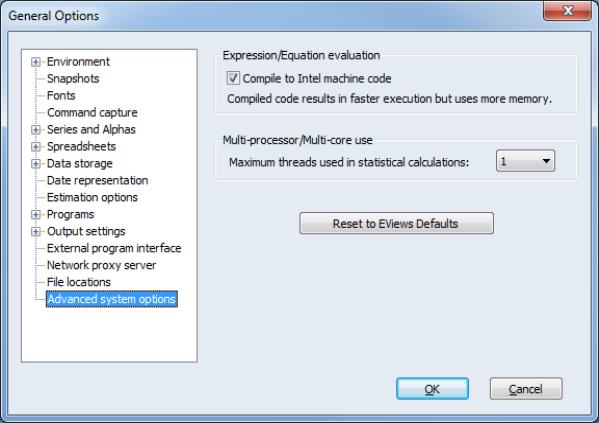
Advanced System Options
You may use the dialog to set memory allocation and expression evaluation options. Unless there is a specific reason for changing settings, we strongly recommend that you use the default EViews settings.
Memory Allocation
The top portion of the dialog allows you to adjust the EViews memory allocation settings.
By default, for 32-bit machines, EViews allows a maximum of 4 million observations per series. You may use the dropdown menu to increase or decrease this limit. If you using the 64-bit version of EViews, this control will not appear, and you will be limited to 120 million observations per series.
The total memory available for all EViews objects is limited by the maximum address space per application. Standard Windows XP systems allow for 2GB of address space, but may be configured to use 3GB (using the /3GB switch). Windows XP x64 systems allow for 4GB of address space per application. The amount of available address space in 64-bit versions of Windows will depend on the specific version. Note that if the amount of physical memory available is less than the address space in use, available disk space will be used as virtual memory, which will significantly degrade performance.
EViews reserves a portion of this address space for auxiliary purposes. This memory is used by the operating system, DLLs, external database drivers, and by EViews when creating objects. Reducing the size of the reserved space will increase the amount of address space available for holding observations, but will decrease the total number of objects allowed in EViews, and may lead to instability caused by out-of-memory conditions.
By default, EViews increases the speed of evaluation by first compiling expressions to machine code. The pre-compiled code executes more rapidly, but the compilation procedure and evaluation requires additional memory. You may uncheck this setting to use the slower, memory efficient method of evaluation.
Multi-Processor Use
The section may be used to define the maximum number of threads you would like to allow EViews to use when processing statistical calculations. EViews treats processors and cores symmetrically, and does not include hyper-threaded processors. In general, we recommend leaving this setting at .
When set to , EViews detects the number of cores in your system and attempts to use all of them. You may override this setting for up to eight threads. This allows you to increase the number of threads EViews uses to beyond the physical number of cores. We have not found this to be effective, but, in principle, it could improve performance with hyper-threading. If you require more processing power for other applications, you may wish to limit the number of threads EViews uses by setting this number below the physical number of cores. This is guaranteed to work with Intel processors, and, to our knowledge, should work with other brands of processors as well.
You may click on the button to return to the default settings.
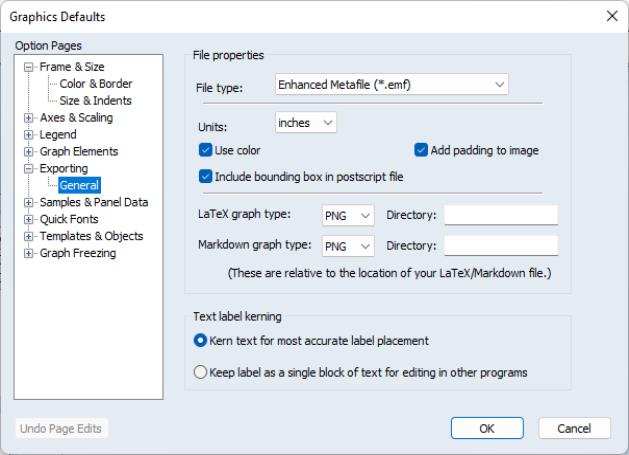
Graphics Defaults
These options control how a graph appears when it is first created. The great majority of these options are explained in considerable detail in
“Graph Options”.
Additional dialog pages are provided for specifying the default settings for use when saving graphs to file () and for handling sample breaks, missing values, and panel data structures ().
Default settings for color and background transparency may be set in the entry of the dialog.
The section lets you set multiple graph font settings all at once. You can change the font face, style and size for all axes, legends, text objects and observation labels in a single step.
Database Registry
The settings are described in detail in
“The Database Registry”.
Cloud Management
The settings are described in
“Cloud Drive Support”.
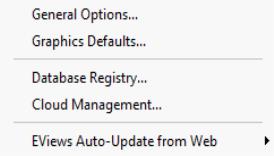
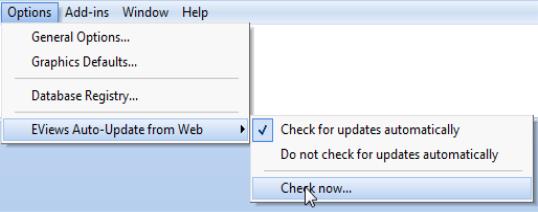
EViews Auto-Update from Web
S&P Global Inc. occasionally releases patches to the EViews program, and we strongly recommend that you keep your copy of EViews as up-to-date as possible.
EViews includes an automatic updating feature that can check for new updates automatically, and install any update that may be available. The automatic update feature can be disabled from the item in your main EViews menu. You can also manually check for updates from within EViews at any time by selecting under the menu item, or by selecting from the menu.
You may also check for updates to the EViews program or for updates to supplementary components such as the EViews documentation or sample data and programs, by visiting the Download section of the EViews website (
www.eviews.com).