Managing User Object Classes
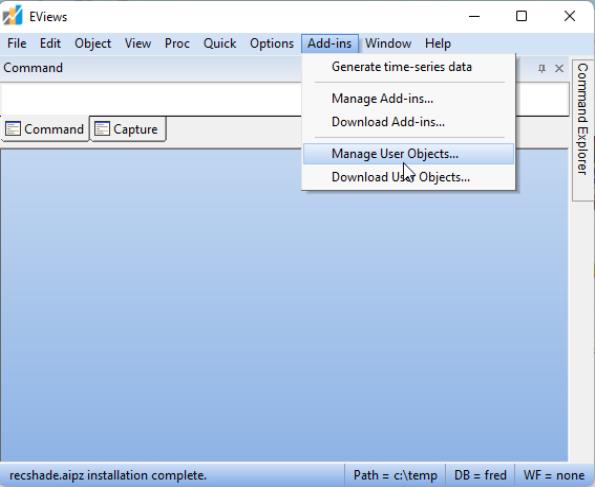
To manage your user object definitions, select from the main EViews menu.
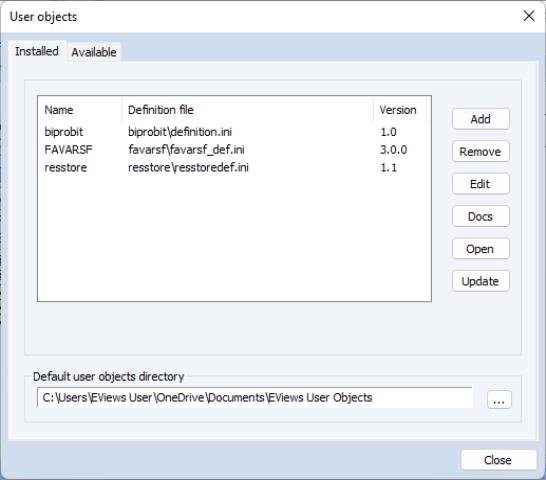
EViews will display the management dialog opened to the tab:
The top portion of the dialog shows settings for currently registered user object classes. The column shows the name of the class, the column displays the location and file name of the definition “.INI” file for the class (see
“Creating an Object Definition File”), and the column shows the version number of the user object class.
Note that you may click on the column headers in the list to sort the list by the contents of column.
You may use the buttons on the right-hand side of the dialog to manage your classes:
• To delete a class, simply click on the name in the Add-ins management dialog and press the button.
• To edit the settings of an existing user object class, select it from the list and click on the button to display the dialog. The dialog settings are described in
“Registering a User Object Class”.
• To open and edit the INI definition file for the user object class, select it from the list and click on the button.
• To examine the documentation file associated with a class, click on the name and press the button.
• To check whether the userobj class has an updated version available, and to install the update if available, click on the button. Note you may select multiple classes at the same time and click the button to update the set. You may also right click anywhere on the list of user object classes and select to update all of your classes.
Default User Objects Directory
The bottom portion of the tab shows the default user objects directory. The default directory is where user objects will be installed and where the user object programs will search for supplementary files if explicit directory locations are not provided. To change the default directory, click on the button on the right and navigate to the desired directory, or simply enter the desired folder name. Click on to accept the settings.


