Managing Add-ins
EViews offers a complete system for managing your Add-ins. To bring up the management dialog, you should select from the main EViews menu:
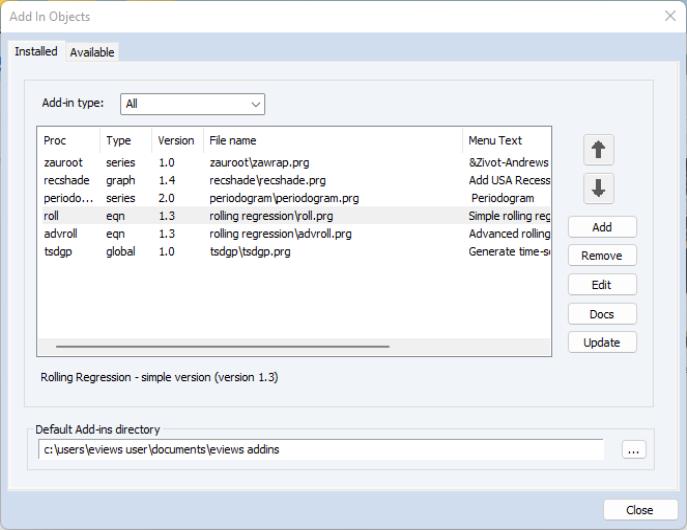
The management dialog is divided into two sections:
• The section is where you will perform most of the tasks of managing your Add-ins (add, delete, edit, update, and reorder Add-in definitions, and view the documentation file).
• The section allows you to set the default directory for your Add-ins.
Registered Add-ins
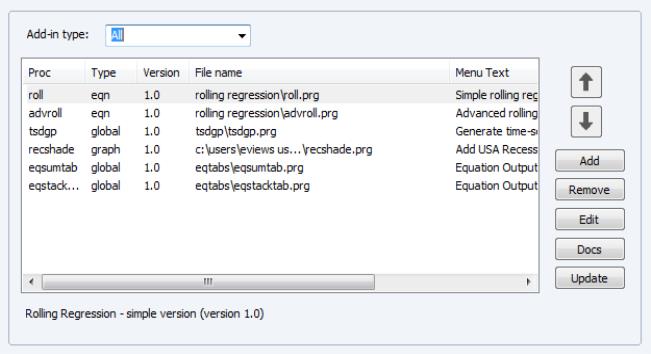
The top portion of the dialog shows settings for currently installed Add-ins, with each line devoted to an Add-in.
By default, all of the installed Add-ins will be displayed. You may use the drop-down menu to filter the list, showing for example only global or only equation-specific Add-ins.
The column shows the name (and possibly location) of the Add-in program, and the column indicates whether the Add-in is global or object-specific. The column shows the command keyword associated with the Add-in (if any), while the column shows the text used in the user-defined menu entries. The column show the version number of the Add-in.
You may use the buttons and arrows on the right-hand side of the dialog to manage your Add-ins:
• To add a new Add-in to the list, simply click on the button to display the dialog. The dialog is described in detail in
“Registering an Add-in”.
• To delete an Add-in, simply click on the name in the Add-ins management dialog and press the button.
• The order in which your Add-ins appear in the menus may be controlled using the up and down arrows. If you have many Add-ins, putting the most frequently used Add-ins first in the list may simplify menu access (see
“Menu Congestion”). In addition, the order in which Add-ins appear can have important consequences in the event that Add-ins duplicate command names (see
“Command Masking”).
• To edit the settings of an existing Add-in, select it from the list and chick on the button to display the dialog. The dialog is described in detail in
“Registering an Add-in”.
• To examine the documentation file associated with an Add-in, click on the name and press the button.
• To check whether the Add-in has an updated version available, and to install the update if available, click on the button.
Note you may select multiple Add-ins at the same time and click on the or buttons to perform the specified operation. You may also right click anywhere on the list of Add-ins and select to check for updates on all of your Add-ins.
After modifying the desired settings, click on to accept any changes.
Default Add-ins Directory
The bottom portion of the Add-ins dialog shows the current default Add-ins directory. The default directory is where an Add-in will search for supplementary files if explicit directory locations are not provided. To change the default directory, click on the button on the right and navigate to the desired directory, or simply enter the desired folder name. Click on to accept the settings.


