The EViews Window
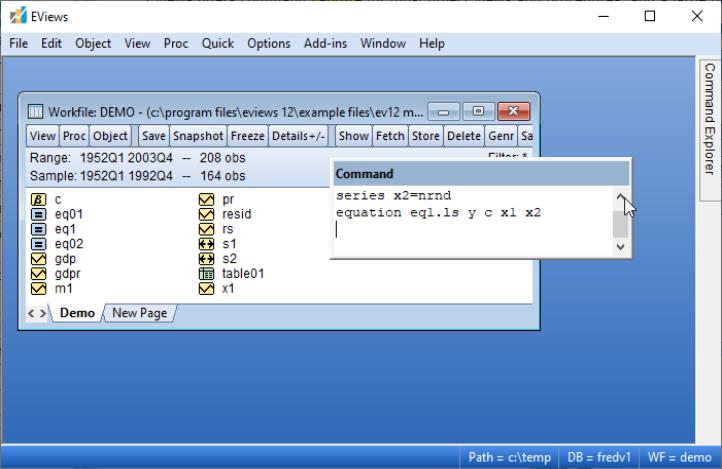
If the program is installed correctly, you should see the EViews window when you launch the program.
You should familiarize yourself with the following main areas in the EViews window.
The Title Bar
The title bar, labeled , is at the very top of the main window. When EViews is the active program in Windows, the title bar has a color and intensity that differs from the other windows (generally it is darker). When another program is active, the EViews title bar will be lighter. If another program is active, EViews may be made active by clicking anywhere in the EViews window or by using ALT-TAB to cycle between applications until the EViews window is active.
The Main Menu
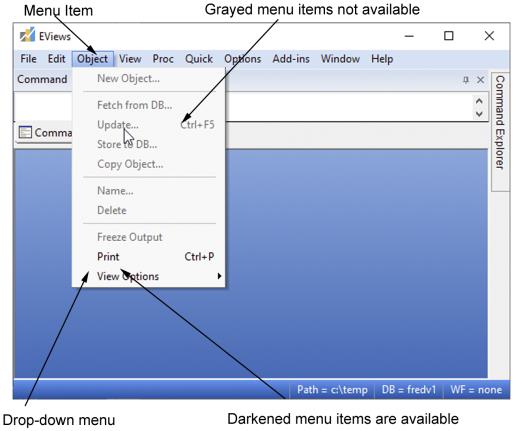
Just below the title bar is the main menu. If you move the cursor to an entry in the main menu and click on the left mouse button, a drop-down menu will appear. Clicking on an entry in the drop-down menu selects the highlighted item.
For example, here we click on the entry in the main menu to reveal a drop-down menu. Notice that some of the items in the drop-down menu are listed in black and others are in gray. In menus, black items may be executed while the gray items are not available. In this example, you cannot create a or an object, but you can and . We will explain this behavior in our discussion of
“The Object Window”.
The Command Window
Below the menu bar is an area called the command window. EViews commands may be typed in this window. The command is executed as soon as you hit ENTER.
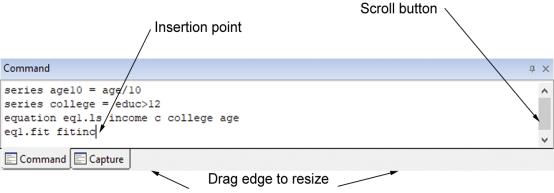
The vertical bar in the command window is called the insertion point. It shows where the letters that you type on the keyboard will be placed. As with standard word processors, if you have typed something in the command area, you can move the insertion point by pointing to the new location and clicking the mouse. If the insertion point is not visible or your keystrokes are not appearing in the window, it probably means that the command window is not active (not receiving keyboard focus); simply click anywhere in the command window to tell EViews that you wish to enter commands.
To toggle between the active window and the command window, press F5.
See
“Window Behavior” for a discussion of focus settings which affect the use of the command window.
Command Editing
The command window supports Windows cut-and-paste so that you can easily move text between the command window, other EViews text windows, and other Windows programs. The contents of the command area may also be saved directly into a text file for later use: make certain that the command window is active by clicking anywhere in the window, and then select from the main menu.
If you have entered more commands than will fit in your command window, EViews turns the window into a standard scrollable window. Simply use the scroll bar or up and down arrows on the right-hand side of the window to see various parts of the list of previously executed commands. You may move the insertion point to previously executed commands, edit the existing command, and then press ENTER to execute the edited version of the command.
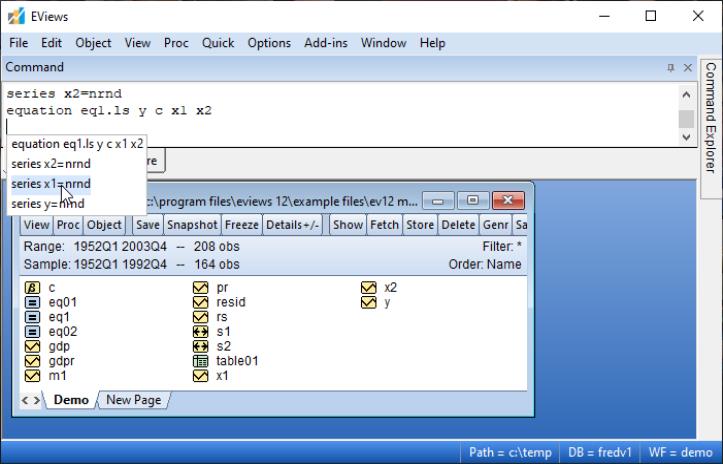
Alternately, to display a list of previous commands in the order in which they were entered, press the Control key and the UP arrow (CTRL+UP). The last command will be entered into the command window. Holding down the CTRL key and pressing UP repeatedly will display the next prior commands. Repeat until the desired command is recalled.
To examine a history of the last 30 commands, press the Control Key and the J key (CTRL+J). In the popup window you may use the UP and DOWN arrows to select the desired command and then press the ENTER key to add it to the command window, or simply double click on the command. To close the history window without selecting a command, click elsewhere in the command window or press the Escape (ESC) key.
To execute the retrieved command, simply press ENTER again. You may first edit the command if you wish to do so.
You may find that the default size of the command window is too large or small for your needs. You can resize the command window by placing the cursor at the bottom of the command window, holding down the mouse button and dragging the window up or down. Release the mouse button when the command window is the desired size.
The Command Capture Window
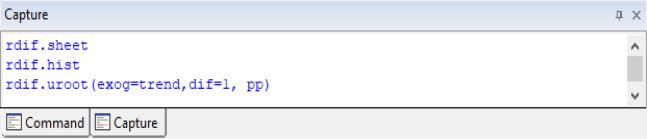
Sharing space with the command window is a command capture window showing the command syntax associated with any operations that you have performed using the EViews interactive dialog interface. You may toggle between the two windows by clicking on the named tabs at the bottom of the area.
You may copy-and-paste from this window, or right mouse click and save the results in a textfile.
Undocking the Command and Capture Window
You may undock and drag the command and capture windows to anywhere on your windows desktop.
Command Explorer
The command explorer provides a quick way to display context specific documentation while working in EViews. In particular, you may use the explorer to list all of the applicable commands and data members for a specific object type, and to display documentation for those commands.
By default, EViews ships with the explorer window docked on the right-hand side of your EViews window. To activate the explorer, simply click on the tab labeled . You may drag the window to undock.
See
“Command Explorer” of the for additional discussion.
The Status Line
At the very bottom of the window is a status line which is divided into several sections.
The left section will sometimes contain status messages sent to you by EViews. The next section shows the default directory that EViews will use to look for data and programs. The last two sections display the names of the default database and workfile. In later chapters, we will show you how to change both defaults.
The Work Area
The area in the middle of the window is the work area where EViews will display the various object windows that it creates. Think of these windows as similar to the sheets of paper you might place on your desk as you work. The windows will overlap each other with the foremost window being in focus or active. Only the active window has a darkened titlebar.
When a window is partly covered, you can bring it to the top by clicking on its titlebar or on a visible portion of the window. You can also cycle through the displayed windows by pressing the F6 or CTRL-TAB keys.
Alternatively, you may select a window by clicking on the menu item, and selecting the desired name.
You can move a window by clicking on its title bar and dragging the window to a new location. You can change the size of a window by clicking on any corner and dragging the corner to a new location.