New Data Handling Features
EViews 8 offers a number of features for data handling. Among the highlights:
Spreadsheet Editing Tools
EViews 8 provides sophisticated new tools for editing and adjusting the values in an EViews series or group.
Typically, the primary method of generating series values is to use a series expression. EViews will evaluate the series expression for all observations in the current sample and assign values accordingly. Note that working with subsets of data requires specifying a new sample for each subset operation. Alternately, standard editing of series values by entering numbers can be cumbersome, at best.
EViews 8 changes all of this by providing tools that allow you to enter and modify individual values in a series using a powerful array expression language, and to view the effects of those changes on the series values.
Edit Mode
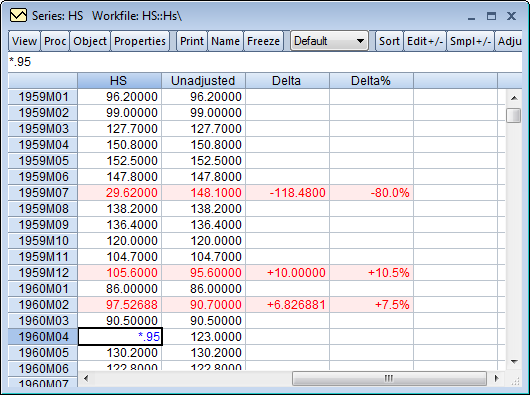
Standard editing now allows you to use the expression language to assign or modify one or more cells. When Edit mode is enabled by toggling the Edit +/- button, you may simply select the cells you wish to edit, then use array expressions to describe how you would like the multiple cells to be modified.
Adjust Mode
EViews 8 offers an adjust mode which may be enabled by toggling the Adjust+/- button on the spreadsheet toolbar. The adjust mode allows you to use sophisticated editing tools to make prospective changes in the series and to see the impact of those changes in an interactive fashion. These changes may be specified in natural units, so, for example, if you wish to examine the impact of a 10% increase in the values in a series over some range, you simply tell EViews that “Delta %” equals 10.

Since changes made in adjust mode are not permanent unless specifically made so when you close the series window, this powerful tool you to changes to a series to perform quick “what if” analysis without permanently changing the series.
Group Comparison Tools
EViews 8 lets you easily compare the data between the series in your group. When looking at the Spreadsheet view of the group, simply press the Compare +/- button on the toolbar to enter compare mode. Compare mode will behave differently depending upon whether there are only two series in the group, or more than two. In both cases the main feature of compare mode is that it will highlight, in red, any observations for which the series in the group have different values. This can be useful when comparing revisions to series in order to quickly find for which observations any revisions or changes have been made.

Dated Data Table Support
Dated data tables have been improved with added customization options, including unit and label formatting, font and color selection on an individual series level, and tools for customizing date format and appearance.
Additionally, program language support is now offered for the customization of dated data tables.
Excel .XLSX file support
EViews now offers write support for Excel XLSX files. Previously, EViews 7 offered read, but not write, support for XLSX files, and prior versions of EViews did not support the format.
EViews also offers the ability to write into an existing Excel file without over-writing the data currently stored in that file. You may specify the exact cell you wish EViews to start writing to.
Transposed Foreign Data Reads
In EViews 8 You may now read transposed data from a foreign file into a new or existing workfile page using the File/Open Foreign Data as Workfile..., Proc/Load Workfile Page..., or Proc/Import/Load Workfile Page... dialogs.
Previously you could only read transposed data into an existing workfile page using the older (now mostly deprecated) Proc/Import/Import from File... dialog and the corresponding read command, which supported fewer foreign source formats. Notable among the formats that read did not support was Excel “.XLSX”.
Custom Object Attributes
Objects in an EViews workfile may now be assigned custom attributes. These attributes may be used by search queries in EViews workfile and database operations. In some cases, EViews will be able to import custom attributes along with the data from third-party databases.
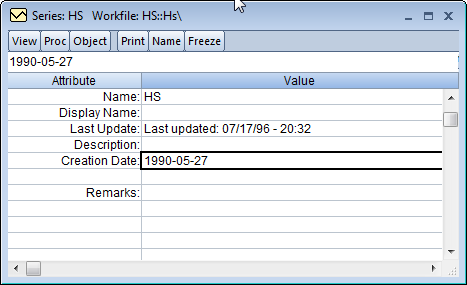
You may create or edit a custom attribute by clicking on the Label view of an object, and typing the name of the custom attribute below the Description field and the value of the attribute in the field to the right.

